Meteora's Spot strategy: insane fees, crazy risk, and why it's misunderstood.
How Spot works on Meteora DLMM, when to choose it over Bid-Ask, and how I pick tokens and set ranges to keep impermanent loss in check.
The @MeteoraAG Spot strategy: insane fees, crazy risk, and one of the most misunderstood tools in DLMM. Most LPs avoid it. But in the right conditions, it can print good.
Here's how it works and why it might become your favorite farming strategy.
What is the Spot strategy?
- You provide 50/50 liquidity in a tight price range, fully inside the active bins.
- You become the market itself: every trade within your range earns you max fees.
🟢 Best for: high-volume tokens, hype launches, or strong ranges and sideways price action.
🔴 Risks: massive impermanent loss (IL) if price breaks out and doesn't return.
When done right, it's like owning a fee-generating machine. When done wrong… it's pain.
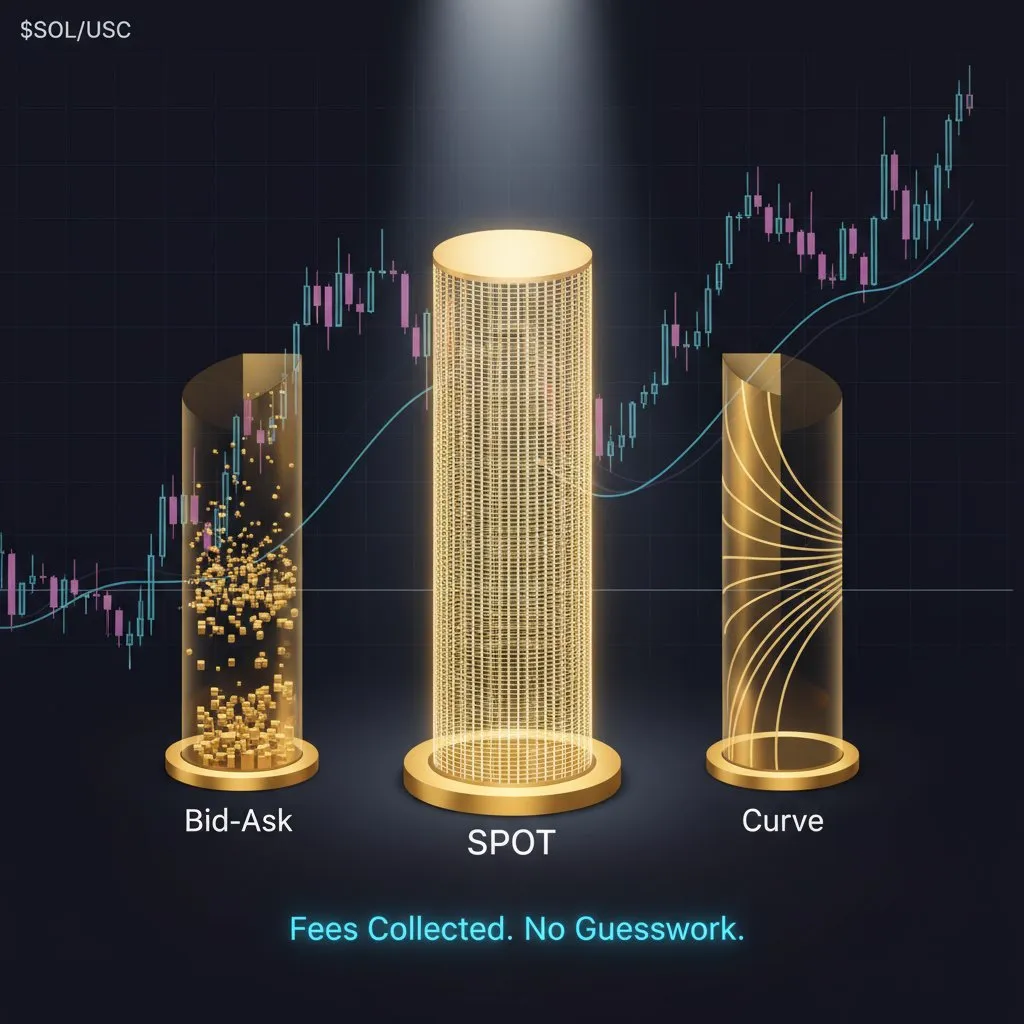
Liquidity shapes: Spot vs Bid-Ask vs Curve
Let's explain it first on the $SOL/USDC pair.
When you LP, your first move is picking how to shape your liquidity. Ranges matter, but where your capital sits inside them matters more.
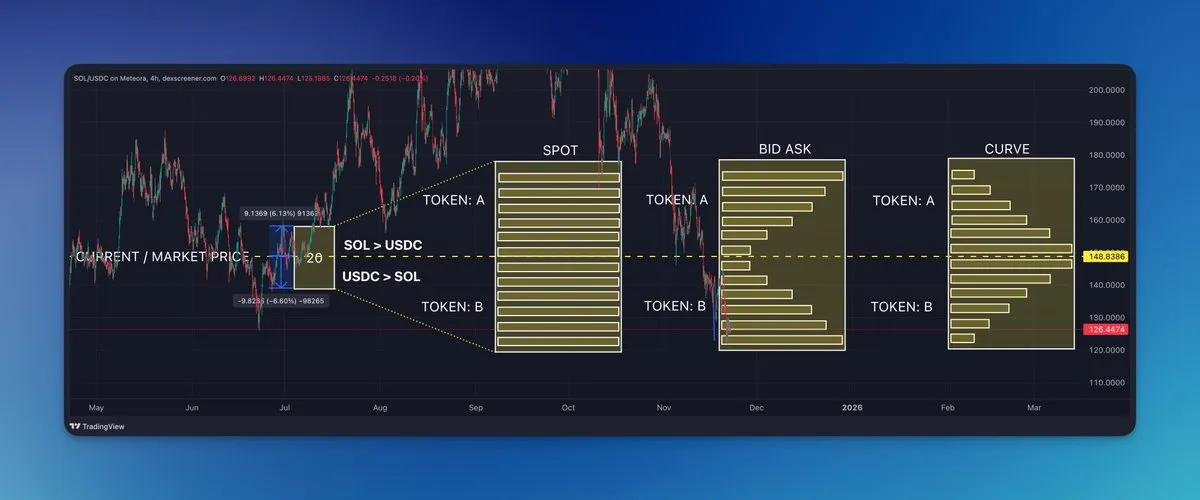
Take a look at the chart below. I've drawn out exactly how your tokens get deployed with a 50/50 split in each strategy:
- Spot: see how the bars are uniform? That's your liquidity spread evenly over all bins. You're always earning across the whole range. My default for this more stable pair.
- Bid-Ask: notice the liquidity piled up on the edges? Perfect for catching big swings or DCA-ing in. Not for stable chop, because you earn less, or not much, when the price sits around the current market price (your entry) for longer.
- Curve: the liquidity is concentrated in the middle. High efficiency if price stays there, but risky if it moves even slightly. You earn less when the price goes to the edges.
This shows you the core difference. Choose wisely for your $SOL/USDC or blue chip bag!
One-sided LP: are you buying or selling?
This is the most critical piece of DLMM to understand.
With one-sided liquidity, you're not just providing, you're literally setting up a DCA buy or sell wall based on the current market price.
1. $USDC one-sided (the bid)
- You deposit $USDC.
- You are setting your position to buy $SOL.
- This only happens if the $SOL price drops into your range.
- You earn fees only when the price is moving down and trading in your range.
2. $SOL one-sided (the ask)
- You deposit $SOL.
- You are setting your position to sell $SOL for $USDC.
- This only happens if the $SOL price goes up and, by that, moves into your range.
- You earn fees only when the price is moving up and trading in your range.
The rule: choose your side based on your price prediction. If you expect a dip and want to buy, use $USDC (or $SOL, if you mostly LP with it). If you expect a pump and want to sell for stables or for $SOL, deposit the other token of the pair. You only earn fees when the price action moves in your direction.
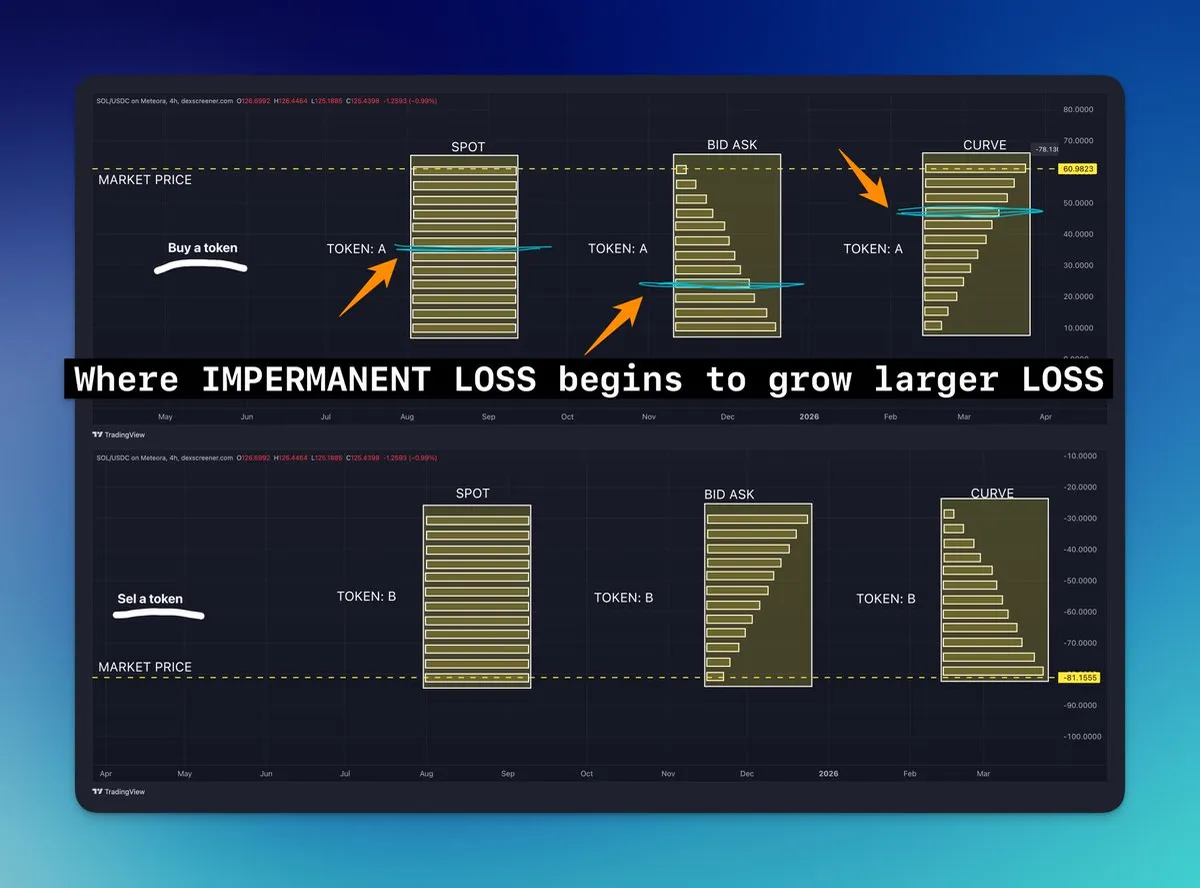
And as you see on the image below, with the Spot strategy you do it evenly. When you buy, your IL will start to grow from around 50% of the range, and when you sell, your average sell price will be around 50% of the range.
IL defense: chart support is your stop-loss
Look, IL (impermanent loss) will happen, but we minimize the damage. For my non $SOL/USDC plays, I'm often using $SOL one-sided on established, high-volume tokens. We're betting on the dump. Your main defense is aligning your range with the chart.
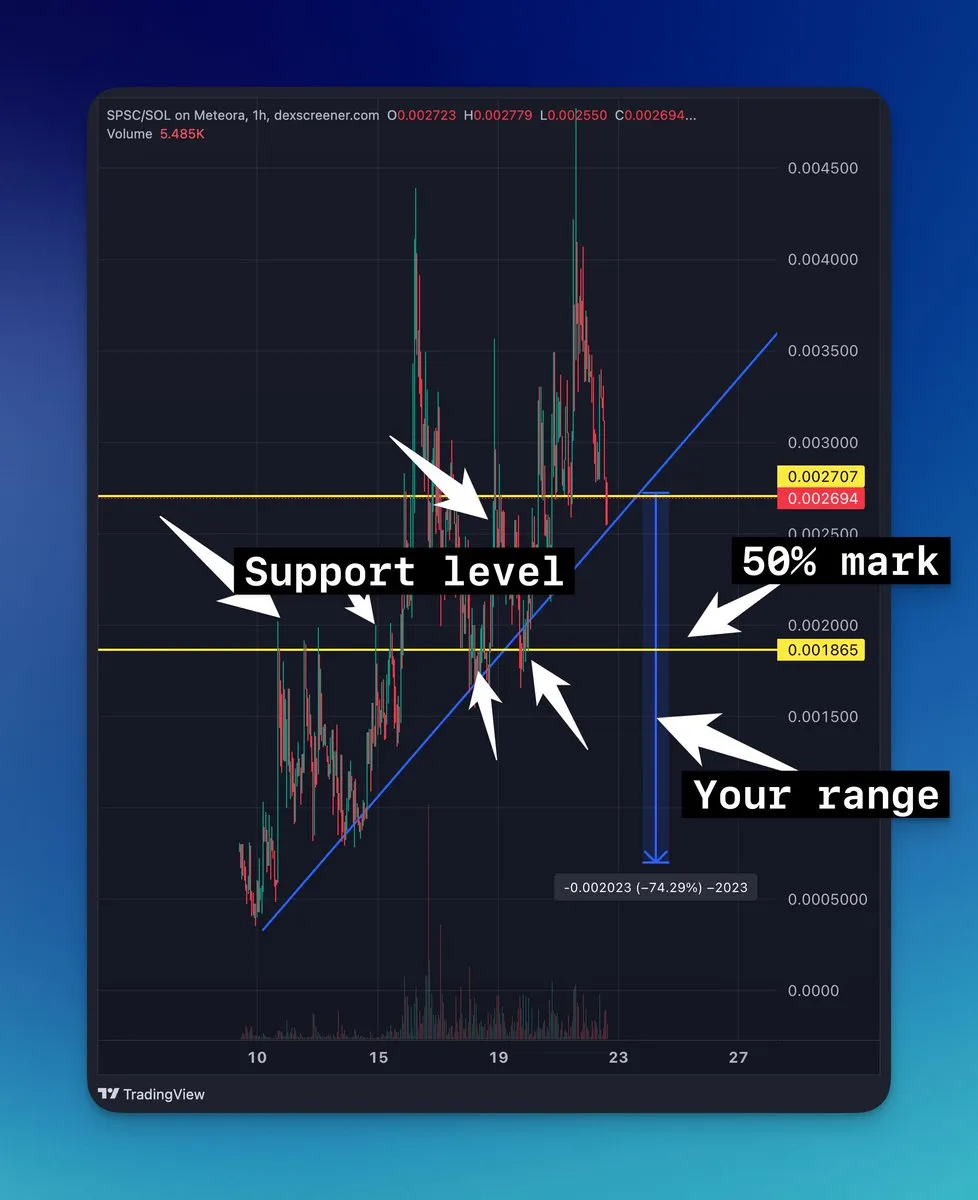
1. Protect the 50% mark. The trap: IL accelerates dramatically once the price moves past the halfway point of your LP range. The fix: set up your range so the 50% mark is protected by a strong, visible support level on the chart. If that support holds, you prevent the position from spiraling into major loss.
2. Double your bins. Forget the standard 69 bins, that's too tight for safety. I often stretch the range to 138 bins. A wider range means less concentration, and the price has to move further to knock you out. You trade minor efficiency for massive IL protection and active fee collection.
The rule: use chart support as your mental stop-loss and widen your range (138 bins) for breathing room.
Token selection: how I stack bags safely
I see LPs farming the trenches, chasing 1,000% APR on tokens that will be dead in a week. If you are not a degen, better skip this. That's not how we build wealth. We're looking for consistent returns, which starts with smart token choice.
Here's my compressed checklist before I open a position on Meteora:
1. The market cap filter (the safety zone). I generally avoid tokens below a $10 million market cap. Anything under $3 million is straight-up dangerous. If I touch it, I use the Layer Cake strategy to manage risk or widen the range up to -80% or -90%.
2. Proof of life and exits (volume + liquidity). Prioritize tokens longer on the market for reliable chart patterns. They must have healthy volume: low volume = low fees and difficult exits. Check the 24-hour liquidity-to-volume ratio, I aim for at least 1:2, but the sweet spot is 1:4.
3. The IDO Spot play. IDO and TGE launches are perfect for a Spot entry. When a token stabilizes after the initial volatility (or moves sideways for hours), the volume is massive, but the price range is relatively contained. A Spot position grabs fees across the entire horizontal chop. You farm the volatility without betting on a specific spike.
The rule: stick to tokens with proof of life and strong liquidity depth.

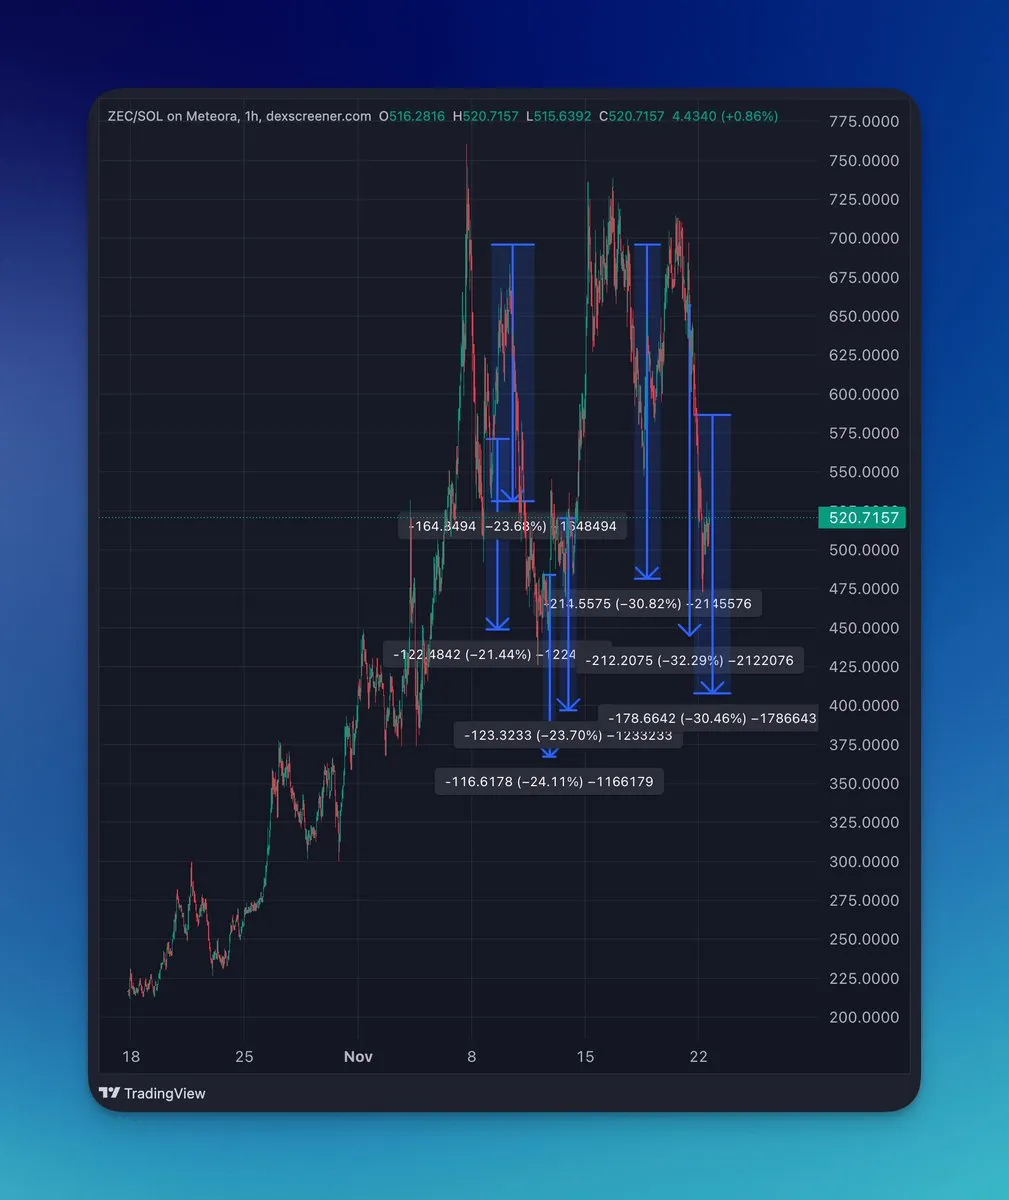
My latest Spot LPs: $ZEC and $SOL
Why?
- High market cap ✅
- Liquidity to volume: more than 1/2 on $SOL, more than 1/4 for $ZEC ✅
- Chart: good support levels for bounces on both ✅
- Safe tokens, hyped, longer on the market ✅
For both, I chose a 20 bin-step and stretched it at least 2x, or up to -32% depending on the entry.
Final thoughts
Choose Spot over Bid-Ask when you expect the token to stay close to its current price, move sideways for an extended period, avoid sharp drops, and maintain good volume, to maximize the fees. If you are not sure, just go Bid-Ask.
However, time your exit carefully on tokens with strong uptrends and watch for breakouts that may require rebalancing.