How to time rebalances on multiday Meteora DLMM positions.
Trading sessions, chart weakness signals, and three ways to reset a DLMM position before the dump hits your range.
If you've been running multiday positions on @MeteoraAG DLMM pools, you know the beauty of set it and forget it. But markets don't sleep. Dumps happen, and smart rebalancing keeps your yields juicy without babysitting.
So let's talk about how to time rebalances around trading sessions, spot chart weakness early, and skip the pain of big dumps. Goal? Protect capital.

Trading sessions are your LP secret weapon
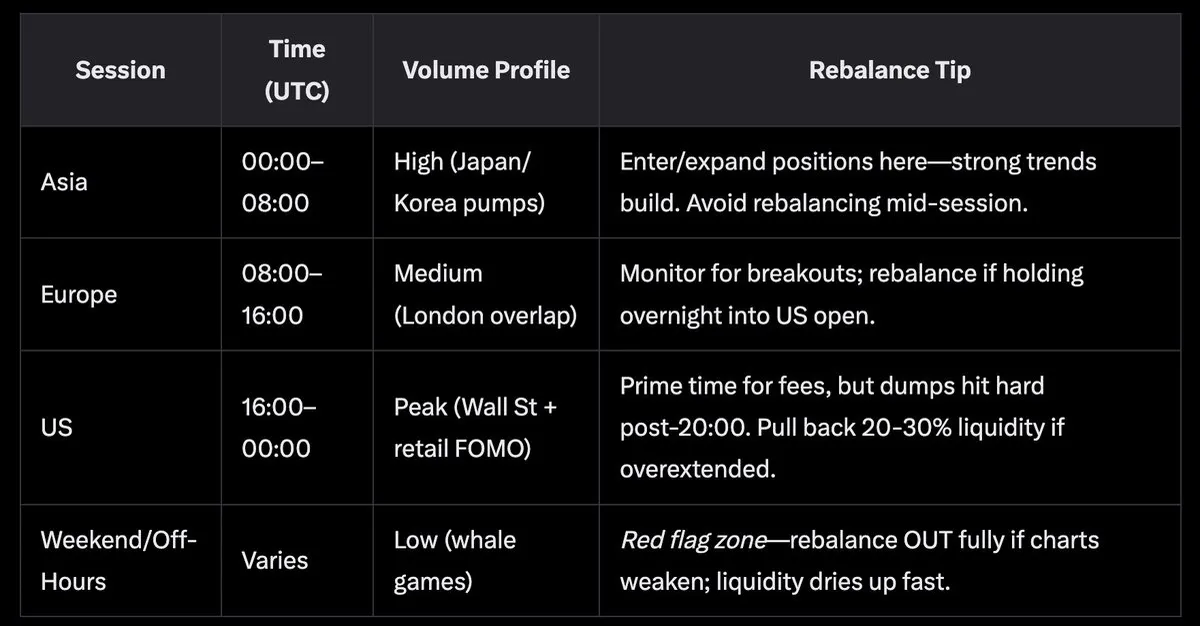
Trading sessions aren't just for traders, they're your LP secret weapon. Crypto never sleeps, but volume ebbs and flows with global hours, creating predictable danger zones for dumps. Rebalance before low-liquidity windows to sidestep slippage and IL spikes.
Key sessions breakdown:
Signals to watch
Charts don't lie, but they whisper warnings before the scream. In DLMM, weakness signals aren't just for exits, they're rebalance triggers.
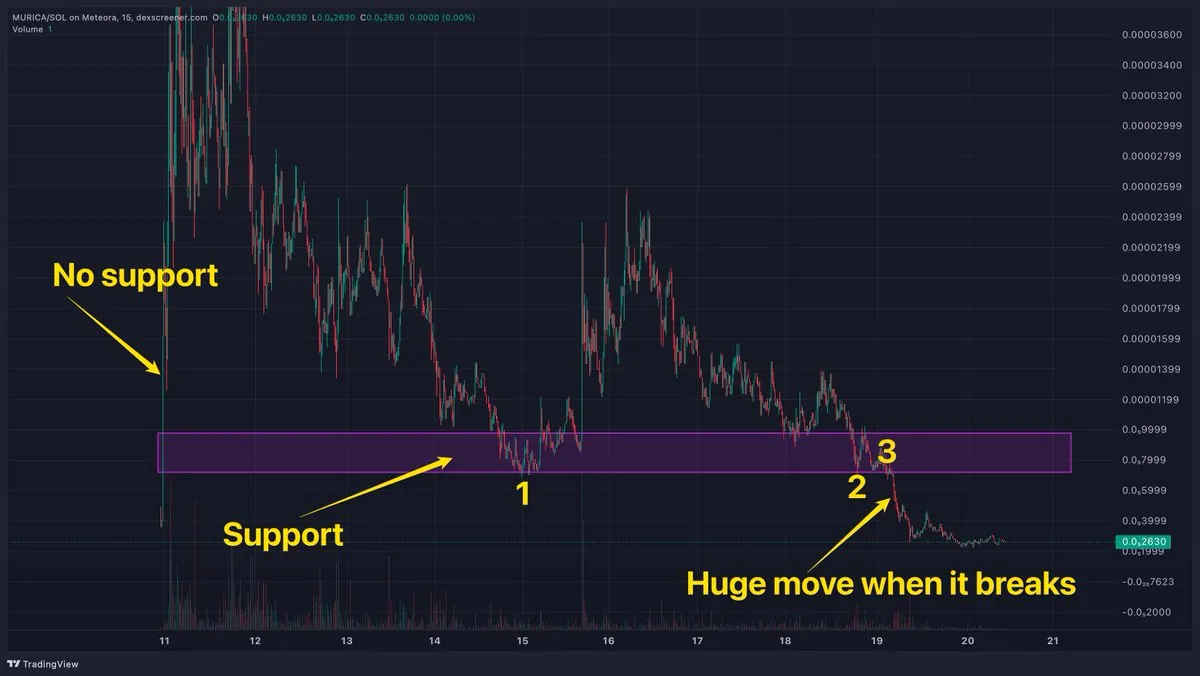
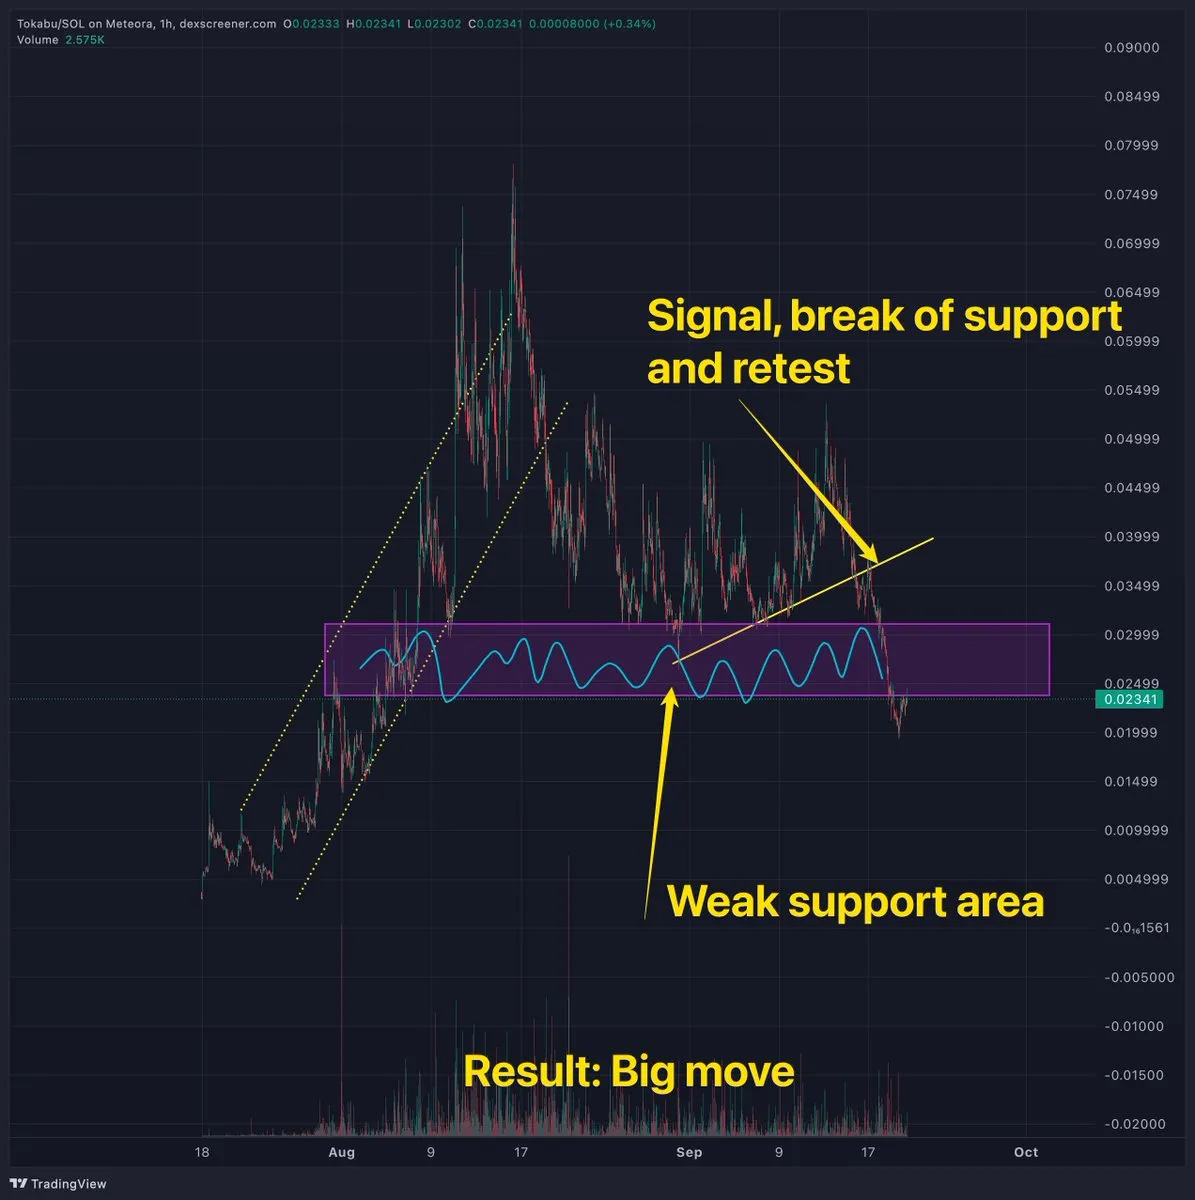
- Support/resistance breaks: multiple touches on a specific price level (e.g., price hugging a level 3x)? Hold steady. Clean break below? Rebalance immediately.
- Patterns as red flags: Head & Shoulders, double tops, or descending triangles? That's a dump prelude and screamed weakness.
- Volume divergence: price up but volume fading? Weak hands incoming.
Some examples below.
Fresh tokens and session timing
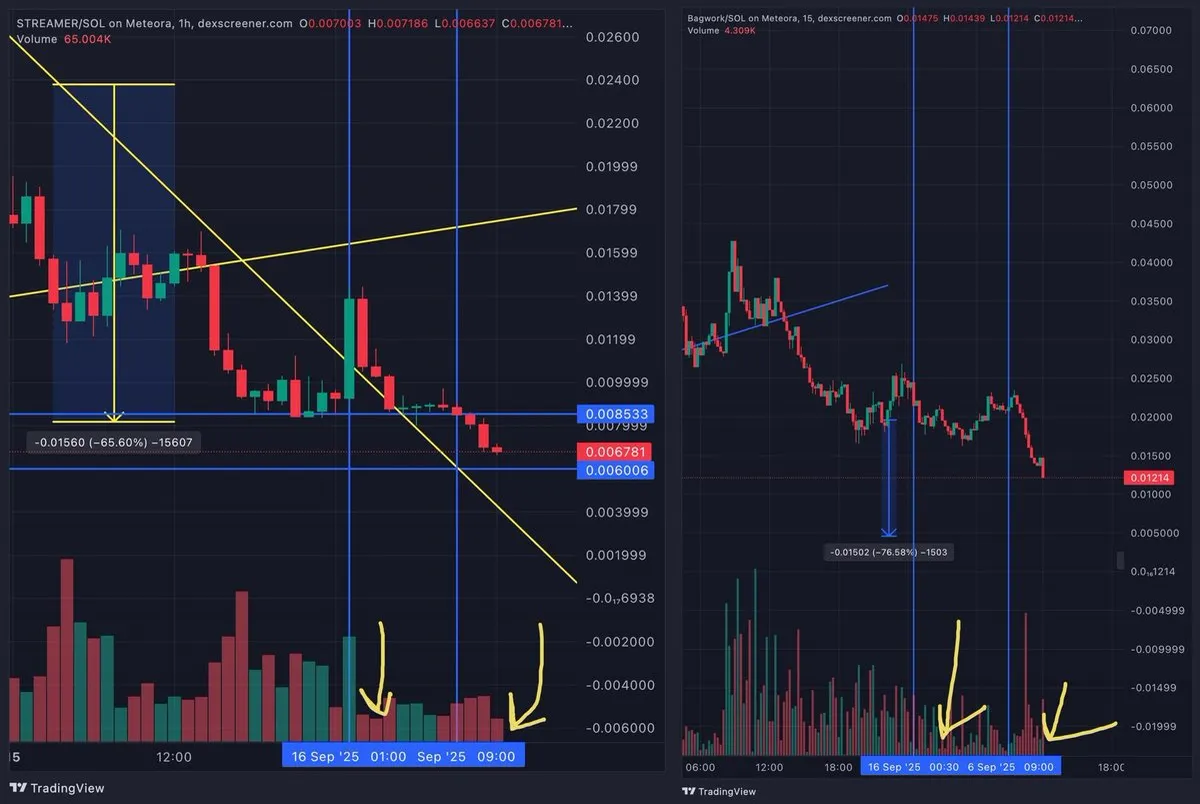
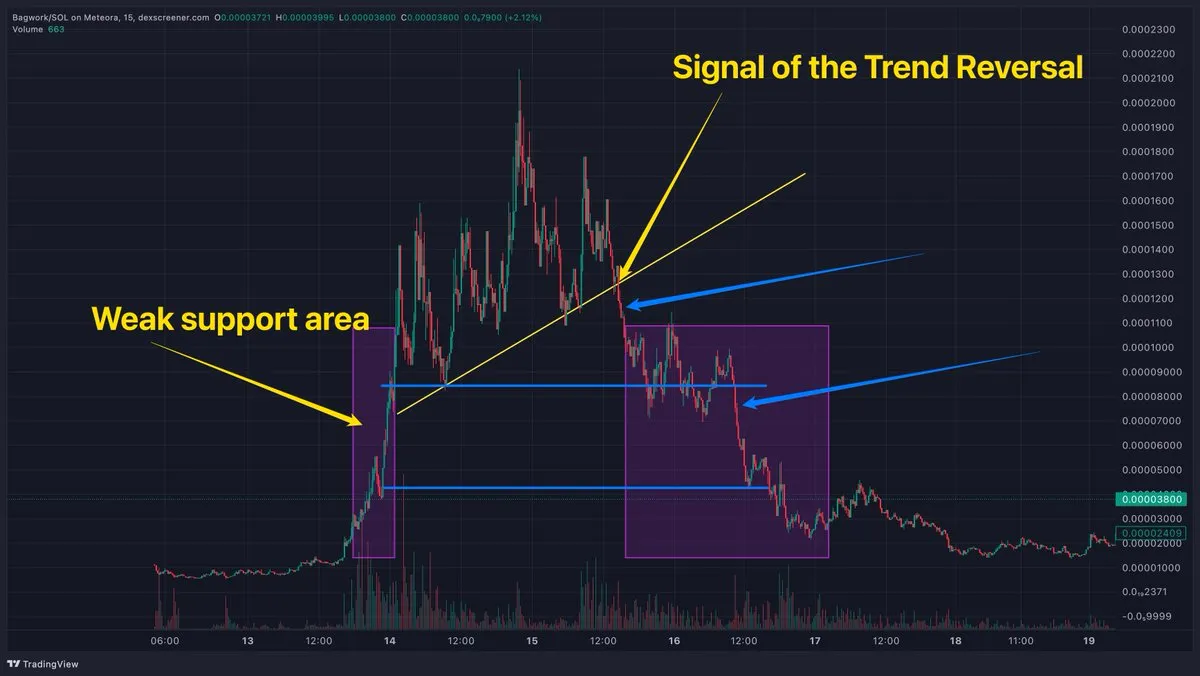
I want to draw your attention to trends and bounces or dumps on fresh tokens. Specifically, a certain pattern related to timing and trading sessions. $STREAM and $BAGWORK, which have similar charts, demonstrated this.
A particular pattern: pumps at night, between 00:00 and 2:00 AM (UTC), and dumps by 8:00 AM or 10:00 AM (UTC). This doesn't happen everywhere. But if you see a pattern, take advantage of it.
How did I behave here? I closed my position on the pump. After the dump, entered it again.
How to act when weakness hits
When weakness hits, or the sessions say get out, don't freeze. Act surgically. Two paths to skip the dump pain: full position close and reopen, or a targeted rebalance. Both let DLMM reset your bins fresh, dodging locked-in losses.
- Skip and re-enter: close the entire position with fees, swap everything to SOL, or use the ZAP-OUT feature, then reopen post-dump. Ideal for >20% projected drawdowns. Why? It zeros out IL exposure, and you can use the break to enter lower.
- Rebalance reset: partial close (e.g., 40% liquidity), adjust bin step and tiers, reopen the rest. Keeps some skin in for fees during chop.
- Create an additional position, like I use in the Layer Cake strategy.
Examples
$TOKABU: if at the retest you are more than 30% in the range with your position, you might be in danger.
$BAGWORK: weak support = price will move very fast without bounces. Better to rebalance at or after the break.
Final words
In addition to using the slow-cook approach and wide range positions, it's important to watch out for chart weaknesses and trading sessions. This awareness can help you even with wide range positions, as significant price movements at inopportune times could result in substantial impermanent loss (IL).
Another example: $MURICA.